Bring your radio online
Setup guide · HamRig Gateway 2.11
Your radio, anywhere.
A small program on the computer next to your radio - the HamRig Gateway - finds the rig, registers it in your account and keeps it online. After that you operate it from any browser: waterfall, audio, TX, logging, FT8. No port forwarding, no router settings.
The whole setup in 50 seconds
What you need
1 Prepare the radio 2 minutes, once
The gateway talks to the radio over CI-V (Icom's control protocol) and takes its audio from the radio's built-in USB sound card. A few menu settings make sure both are available. Menu names below are from the IC-7300 and IC-7610; the other models use the same names.
On the radio: MENU › SET › Connectors
| Setting | Set to | Why |
|---|---|---|
| CI-V › CI-V Baud Rate | 115200 | fastest link; the scan also finds other rates |
| CI-V › CI-V Transceive | ON | the radio reports every knob turn at once |
| CI-V › CI-V USB Port | Unlink from [REMOTE] | USB gets its own CI-V address |
| MOD Input › DATA OFF MOD | USB (or MIC,USB) | transmit audio from the gateway - the gateway can set this for you |
| MOD Input › DATA MOD | USB | transmit audio in the data modes (FT8, RTTY …) |
On the radio: MENU › SET › Network
| Setting | Set to | Why |
|---|---|---|
| DHCP (or a fixed IP) | ON / your LAN | the radio needs an address on your network - note it |
| Network Control | ON | allows remote operation over the LAN |
| Network User1 ID / Password | a name and a password | you enter both in the gateway once |
| Control / Serial / Audio Port | leave 50001 / 50002 / 50003 | the defaults the gateway expects |
The IC-705 joins your Wi-Fi instead (WLAN Set); the rest is the same.
2 Install the gateway 3 minutes
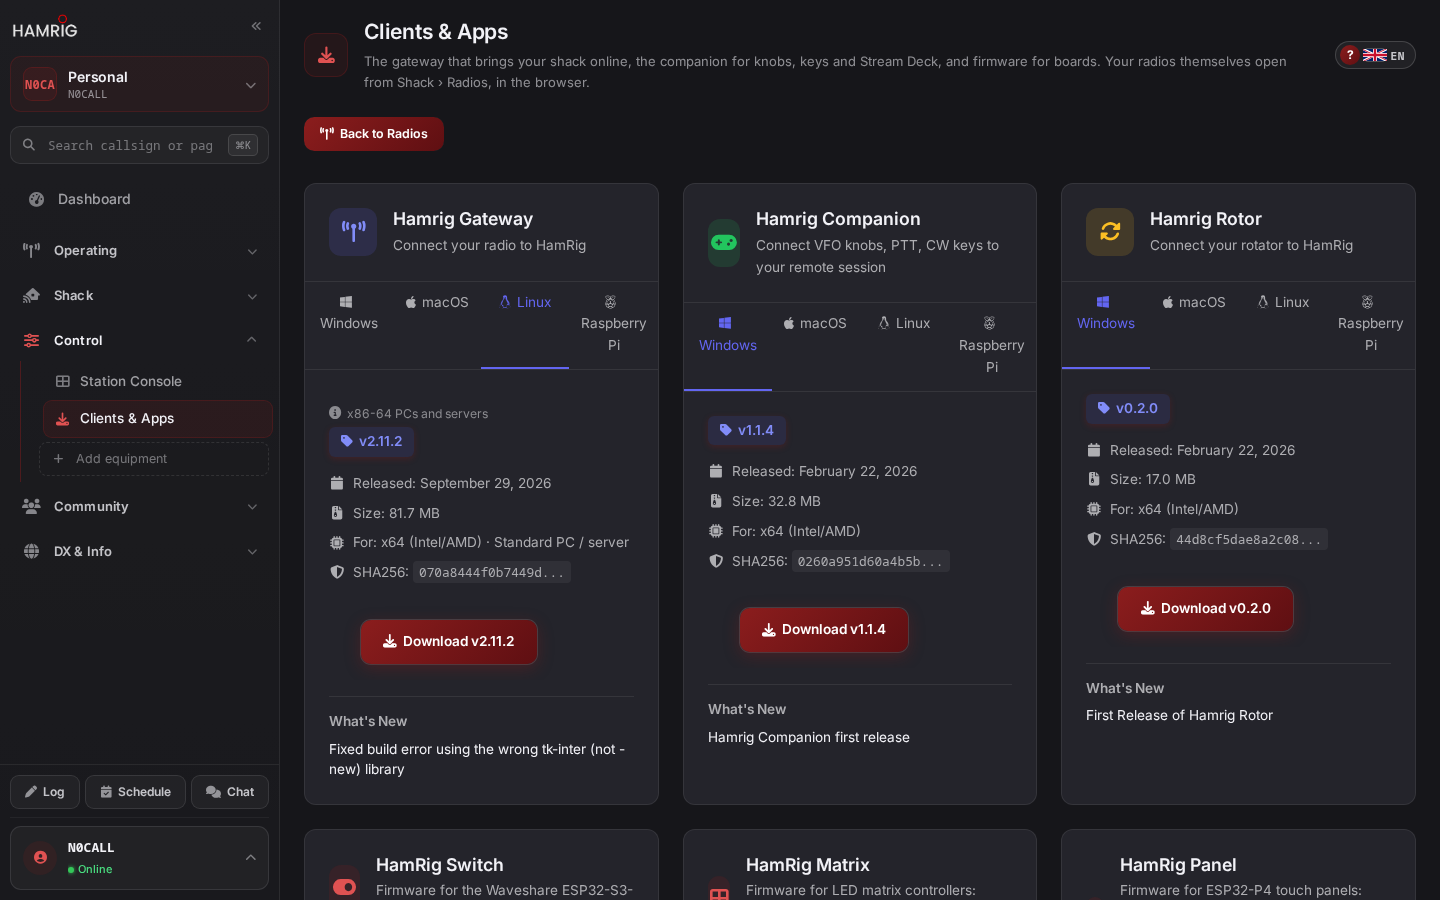
- Open Clients & Apps on the computer next to the radio. The page picks your system; Raspberry Pi has its own tab (64-bit for Pi 3/4/5).
- Download HamRig Gateway for your system and start the downloaded program.
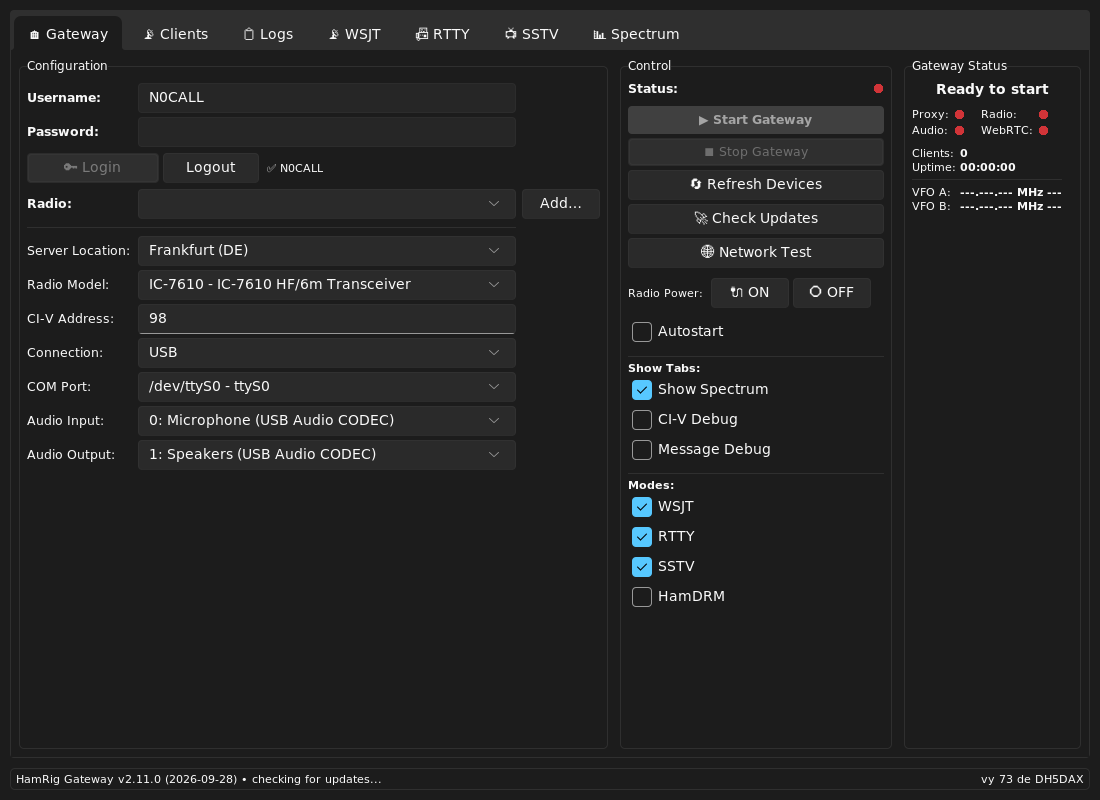
- The first start takes a few seconds. The main window opens on the Gateway tab.
3 Log in 30 seconds
- Enter your HamRig Username (or your e-mail) and Password.
- Click Login. Next to Logout your callsign appears with a tick.
- The Radio list now shows the radios already in your account. For a new radio click Add… - next step.
4 Add the radio 1 minute
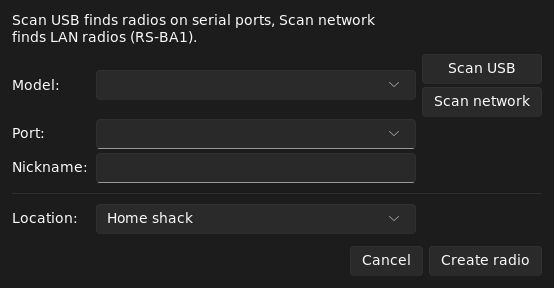
Add… opens Add a new radio to HamRig. It finds the radio, suggests all settings, creates the radio in your account and configures the gateway - you type at most a name.
- Radio switched on and connected by USB? Click Scan USB. The gateway asks every serial port for an Icom radio.
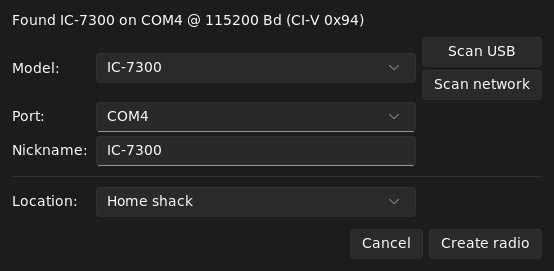
- After a few seconds it reports what it found, for example Found IC-7300 on COM4 @ 115200 Bd (CI-V 0x94). Model and Port are filled in.
- Change the Nickname if you like - that is the name on your radio card.
- Pick the Location, or choose to create a new one (name and, if you like, a locator).
- Click Create radio. The radio now exists in your account, and the gateway is set up for it.
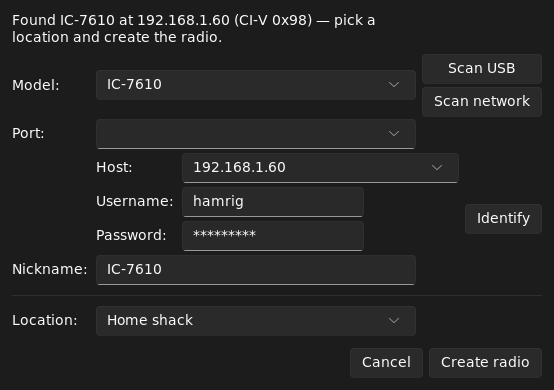
- Click Scan network. The gateway looks for Icom radios on your LAN and puts the address it finds into Host.
- Enter the Username and Password you set on the radio (Network User1).
- Click Identify. The gateway logs in to the radio and reports, for example, Found IC-7610 at 192.168.1.60.
- Name, Location, Create radio - as with USB.
5 Start the gateway 1 minute
- USB radios: check Audio Input and Audio Output - both must be the radio's USB Audio CODEC, not your PC's speakers. (Network radios skip this.)
- Click Start Gateway. It stays grey until radio, port, CI-V address and both audio devices are set.
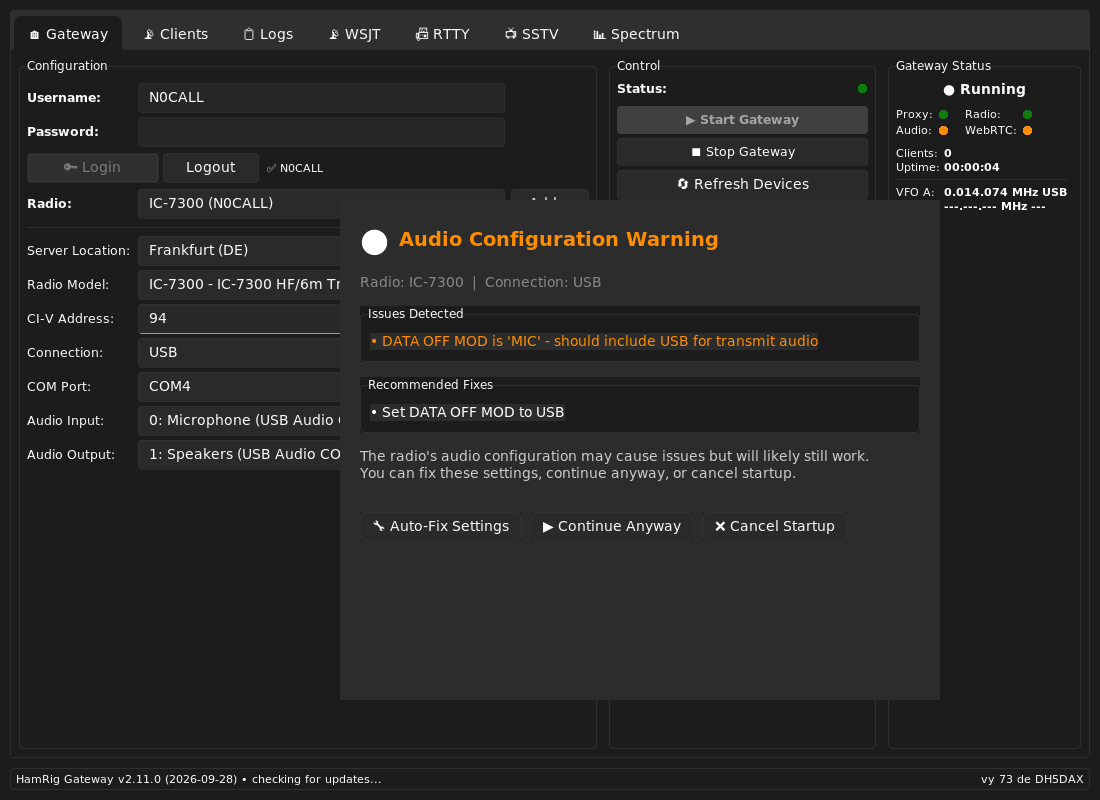
- If the radio's audio routing is not right, the gateway says so in Audio Configuration Warning - click Auto-Fix Settings and it sets the radio for you.
- After a few seconds Running appears top right, Proxy and Radio turn green, and VFO A shows your radio's frequency.
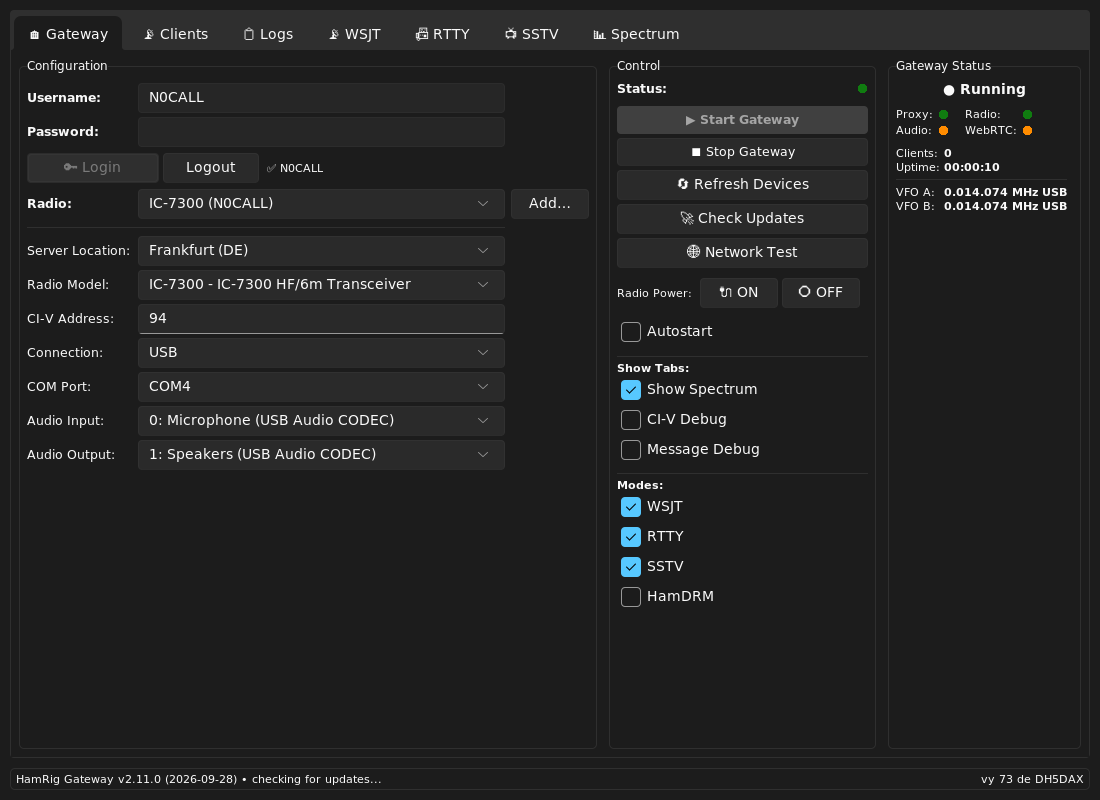
What the lights in Gateway Status mean
6 On the air now
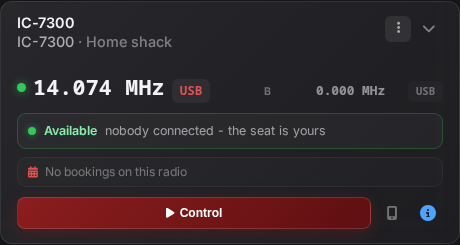
- Open Radios here in the portal. Your radio has a tile; it switches from Offline to Available within seconds, with the frequency and mode from the radio.
- Click Control. The operating client opens: waterfall, audio (click once to allow sound), VFO, bands, PTT.
- The phone icon next to Control shows a QR code - scan it and the radio is on your phone.
If something does not work
Scan USB says “No radio found”
- Is the radio switched on and the USB cable plugged into the radio's USB socket (not the ACC or CI-V jack)?
- Windows: does Device Manager show a new COM port when you plug in? If not, install Icom's USB driver.
- Another program holds the port: close WSJT-X, flrig, logging software with CAT, or a second gateway.
- Check CI-V USB Port = Unlink from [REMOTE] (step 1) and try again. If it still fails, choose the Model and Port by hand - the CI-V address is filled in with the model.
Start Gateway stays grey
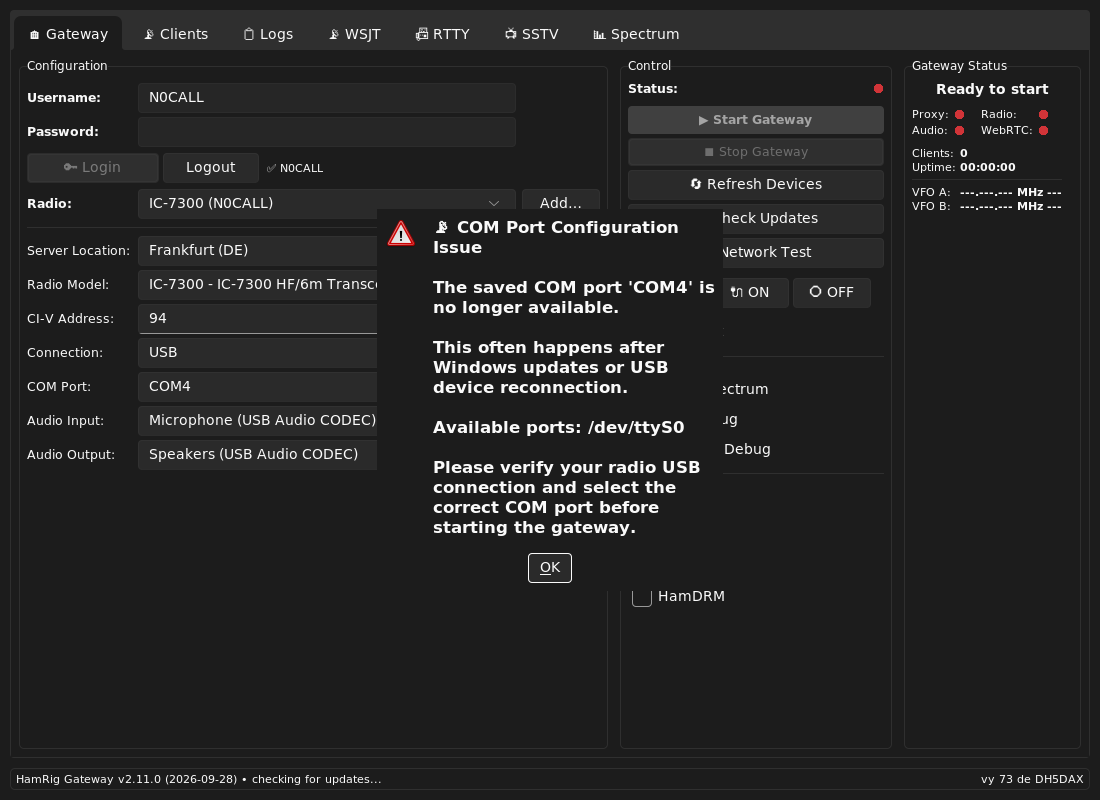
“COM Port Configuration Issue” when starting
The COM port saved last time is gone - typical after a Windows update or when the radio is plugged into another USB socket. Click Refresh Devices, pick the new port under COM Port (or run Add… › Scan USB again) and start.
No sound, or nothing is transmitted
- Audio Input / Audio Output must be the radio's USB Audio CODEC.
- DATA OFF MOD and DATA MOD on USB (step 1) - or accept Auto-Fix Settings.
- In the browser, click the audio button once: browsers only play sound after a click.
- Transmitting also needs TX permission and the control seat - on your own radio you have both.
The gateway runs, but the radio shows Offline in the portal
- Look at the Proxy light: red means the gateway cannot reach the HamRig server. Company, hotel and some school networks block TCP port 9876 - try another network or ask the admin.
- Network Test shows which HamRig servers the computer can reach and how fast.
- Is the right radio selected under Radio? The portal shows the radio whose name is selected there.
Network radio: “nothing answers” or login fails
- Wrong address: check the radio's IP in its Network menu and type it into Host.
- Network Control must be ON on the radio.
- Username and password are the radio's Network User1 - not your HamRig login.
- Right after closing another remote program the radio can need up to a minute before it accepts the next login.